Showing posts with label tutorials. Show all posts

6/26/2007

Layer Masks

Layer Masks are a very powerful part of Photoshop and that is for a couple of reasons:
  • Layer Masks are editable selections that play an important role in non destructive editing
  • Layer Masks offer flexibility because they can be almost completely treated as a full gray scale image, which allows the use of filters, selection tools, adjustment tools, etc.
  • They have a visual strength, meaning that with a short look on the layers you can see how they affect the image
  • They offer extra flexibility by being part of vector masks, layer sets, adjustment layers, etc.
  • Layer masks allow you to save selections.
  • Layer masks can be applied to any layer except the Background. *one must convert the background to a layer to use).
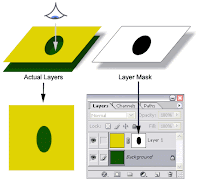
So how do layer masks work? A layer mask is actually telling photoshop how to deal with the layer it's attached to and does this by using shades of gray.

To understand layer masks you have to remember the following:

  • The color black in a layer mask hides the corresponding pixels in the linked layer (actually makes those pixels transparent).
  • The color white leaves the corresponding in the linked layer intact; it doesn't do anything with them
Tutorials:

Fade layer

Adjustment Layer

Exposure Adjustments
6/25/2007

Quick Masks

The uses for masks are endless and Photoshop offers many different types of masks and way to create them--their purpose is to control which areas of an image or layer are edited. They also control which areas are hidden or revealed. Masks offer to advantages:
1) Masks are non-destructive--none of the original work is edited or deleted. It is simply hidden.
2) Masks are flexible--they can be changed at anytime to reveal or hide areas.

Quick Mask:
Quick Mask function is actually a selection viewed in a different mode. Rather than the dotted-line marquee, it is represented in varying shades of red.
*Quick Masks are not permanent.
*The Color and opacity of the mask can be changed by clicking the Quick Mask icon.

Tutorials:
Bright Eyes
(basic/start here)

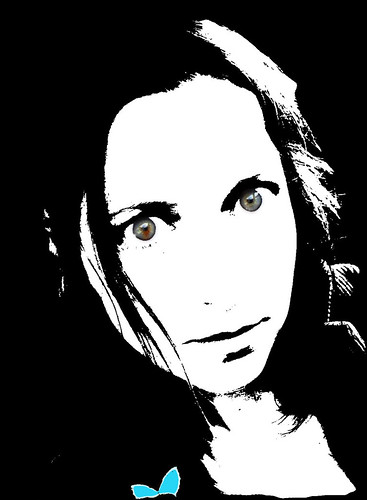
Butterfly Partial Color

Using Masks to Remove the Background

Learn Hawk-Layer Masks

Try the image in the tutorial, then do one on your own!


4/08/2007

Anchors Away: Using Name Anchors

When a document is long or has many sections, you might need to create a series of links that will jump the user to specific places within the document. This technique eliminates the need for the viewer to scroll through long passages of text. It is also an easy way to set up subheading navigation in your website.

A named anchor marks the place in the page to which a link jumps. A named anchor is simply an HTML anchor tagged pair (<>.....< / a>) that includes a name attribute. The named anchor serves as a target for links, allowing links to the middle of a page or wherever the named anchor is located within the document.

Resources: (How to Use a Name Anchor)

This is the easiest way to learn to use name anchors via this video tutorial. Please note it does require Quicktime:
Photoshop Support Video

Down and Dirty Notes:

To add an anchor tag to your page:

  1. Place your cursor at the point where you want to add an anchor.
  2. Click the yellow anchor icon or select Insert > Named Anchor from the Dreamweaver menu. (On the "Common" toolbar, click the named anchor icon--it looks like an anchor).
  3. Give the anchor a name (do not use spaces in the name).
  4. Click OK to add the anchor to the page.
  • Note: You'll see a yellow, anchor icon where your cursor was (you can drag it to a different place in your document, later, if you like).
To link to an anchor tag:
  1. Highlight the text or select the image you want to use as the link.
  2. In the Properties panel, locate the text box next to the word Link and do one of the following:
  • Type the pound sign (#) followed by the name of the anchor (ie "#about us")
OR
  • Using the target icon to the right of the Link text box, click-hold and drag to the anchor icon on the page. Once the anchor is highlighted, let go. This will populate the Link text box with the pound sign followed by the anchor name.

12/03/2006

Photoshop web templates

Photoshop, like Fireworks, can be used to create web pages.

**Note, be sure to check the end product of each tutorial prior to committing.**

Photoshop web page creation tutorials: (choose one)
(Feel Free to change the text, etc to fit your personal preferences.)

Easy:
Clean Layout
Simple Blue Layout
Cool Blue Corp.

Tougher
Black & Sleek
Black & Red Gamer tutorial
Creative Grunge
Gamer
Summer Time
Cool Blue *this one requires use of the pen tool which can be tricky.

Or simply choose your own:
Pixel 2 Life website layouts
Good Tutorials-

Fireworks going off.

Fireworks

Adobe Fireworks (formerly Macromedia Fireworks, also known as FW for short) is a bitmap and vector graphics editor, developed by Macromedia and aimed at web designers (with features such as: slices, the ability to add hotspots etc.). It is designed to integrate easily with other Macromedia products, such as the popular Dreamweaver and Flash, and is bundled in the Macromedia Studio 8 suite.

In December 2005, Adobe completed the acquisition of Macromedia. How the two product lines will merge is still under speculation. Fireworks is most similar in purpose to Adobe ImageReady, in that it is designed specifically for web-based graphics, with somewhat limited print-based capabilities. Unlike ImageReady, Fireworks features vector editing capabilities, and a more robust feature set overall. (source: Wikipedia 12/3/06)


Tutorial:

How to create a website template using Fireworks.

10/29/2006

Building blocks

HTML-Stepping stones to building websites.

What is an HTML File?

  • HTML stands for Hyper Text Markup Language
  • An HTML file is a text file containing small markup tags
  • The markup tags tell the Web browser how to display the page
  • An HTML file must have an htm or html file extension
  • An HTML file can be created using a simple text editor

HTML Basics
Interactive HTML Tutorials

10/13/2006

Monster Photoshop Mashups

Portfolio Item #3 Halloween Portraits

Trick or Treat! This week you will be creating a Halloween Photo for your portfolios on flickr. Your subject matter should come from something you created or shot.

**Remember this are supposed to be FUN so if you have doubts go without. This is not meant to offend individuals but to be an exercise in your creativity.**

Below are some links to get your creative juices following.

Haunted Memories

Monster Mod

I collected a number of tutorials that you can mix and match from. Please note you are free to find you own methods to create your spooky Halloween Photoshop creations.

Monsters
Scary Skin Texture--Using bugs to create skin texture.

Vampire--glowing red eyes and teeth with 24 steps

Vampire #2--glowing eyes, hair and teeth simpler steps.

Monkey Vampire Morph (monkey + blood sucker= monkey vampire?)

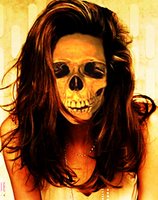
Skull Face--Replacing a face with an image of a skull.

Aliens--Turn an ordinary person into a green Alien.

Aliens #2--Transform someone into an Alien and add a new background

Zombies--Creating the undead.

Zombie #2--Using Mandy Moore to create a hole in your head

Super Quick Zombies


Ghosts--your 6th Sense @ work
Ghostly Background Imaging

Simple Ghosts

Casper

No Bodies: Removing a body from an image

Stone:
Stone Face effect--turning people into stone

Horror Movie Effects
Horror--super gross stuff **yucky**

Other effects:

Aging Photos--Turning color photos into wrinkled torn pages

Aging People--Turning young faces old.

Haunted House- photoshop your favorite contemporary house into an elderly, rotting haunted mansion

Grunge Look

Torn/Burnt Photo Edges--create burnt edges around your images

Fine Art Painted Effect
-Merging fine art with current images. The process itself is not hard however the image matching can be a tuff fit.

Super Werid Dark Art--I am not sure what to say about this one. You end up with some big creepy looking thing with teeth and eyes.